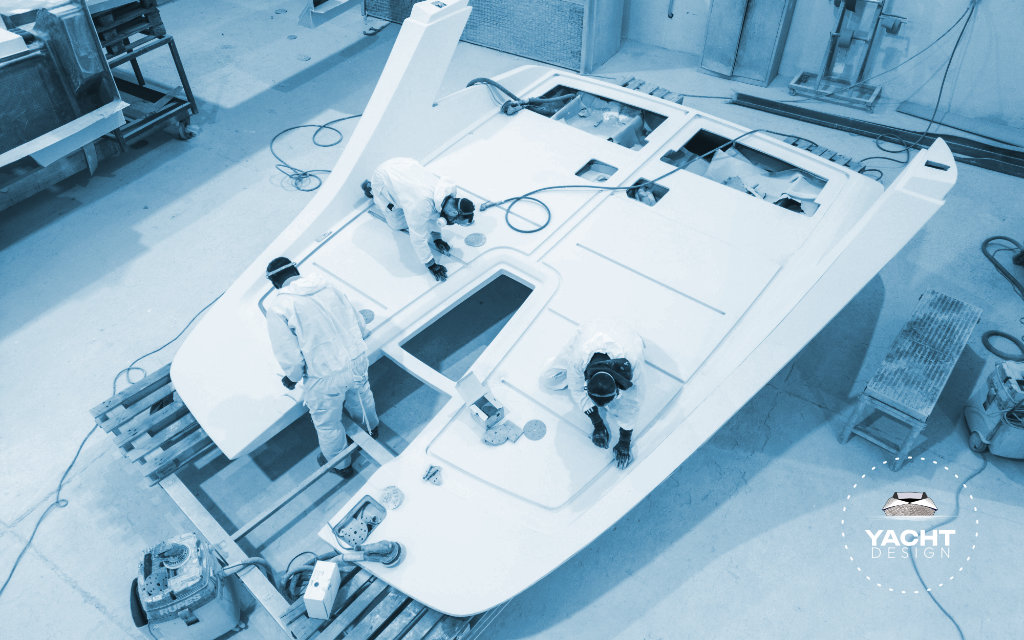
POST-EXTRACTION PROCESSING
Once the fiberglass processing is completed, the parts are infused, and the moldings are cleaned of the consumable materials used, the demolding of the manufactured parts takes place. The molds are made with segmentations (bolted flanges) to allow the removal of the molding in cases where geometries would otherwise prevent extraction (undercut surfaces).
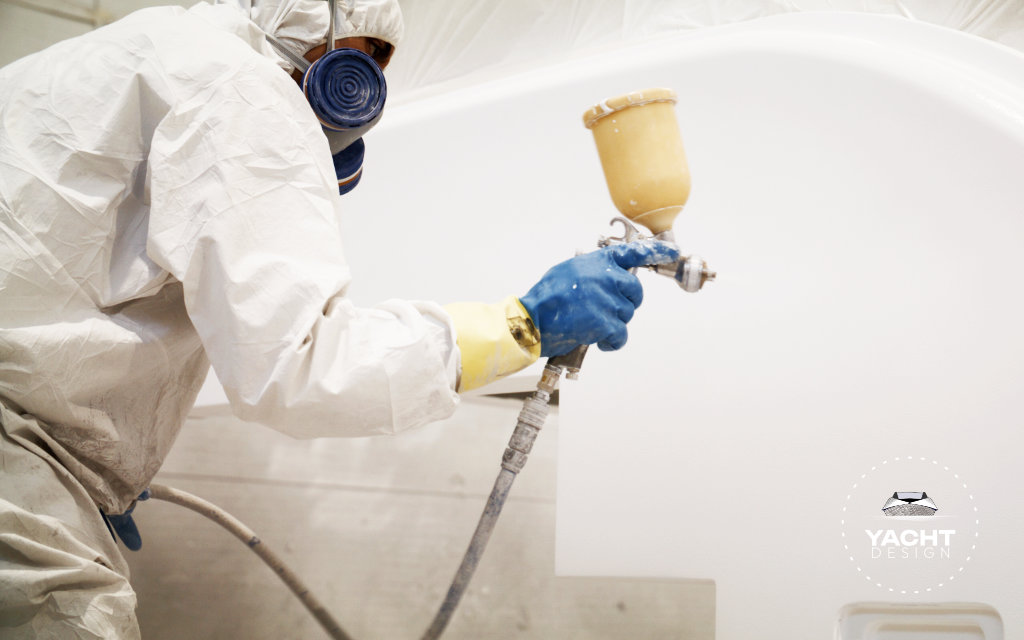
The manufactured part has glossy surfaces, just like the surface of the mold in which it was made. If the mold is in good condition and well-polished, the molding may only require minor finishing at the mold junctions.
During the fiberglass processing, and particularly during the infusion process, the resin heating caused by catalysis may create shrink marks. These are marks or streaks that can be noticed on the glossy surfaces of the manufactured part, especially in areas where the resin accumulates, typically near sharp edges (internal structures, core discontinuities, bulkheads, etc.).
he first processing step after demolding is called trimming, which involves cutting and refining all the surfaces that were shaped in the mold but are not needed in the final product. In the nautical sector, examples include all windows and portholes, which are closed in the mold but must be opened in the molding to prepare for the assembly phases. At the same time, if required, recesses are prepared by scraping off the resin to accommodate the external bonding of the component.
This bonding is done in fiberglass when the manufactured part is produced in multiple molds and then assembled later. Imagine an object with aesthetic functions on all its parts, such as a door. This will be molded in two separate molds and then assembled to form the finished product. The bonding will be applied along the outer perimeter of the assembly.
PRELIMINARY BODYWORK
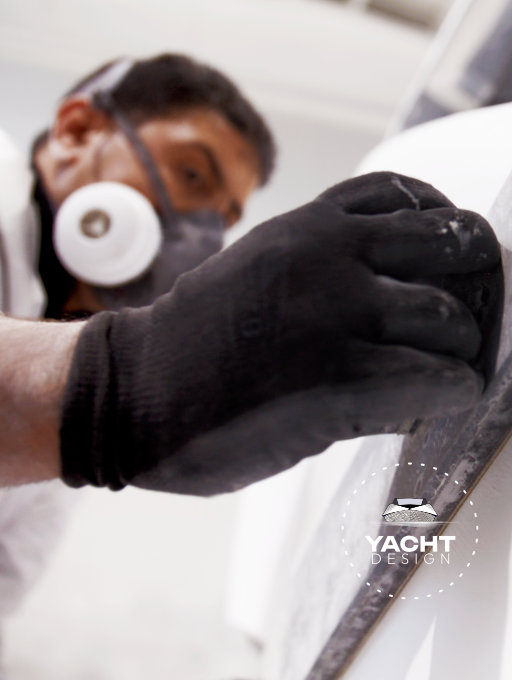
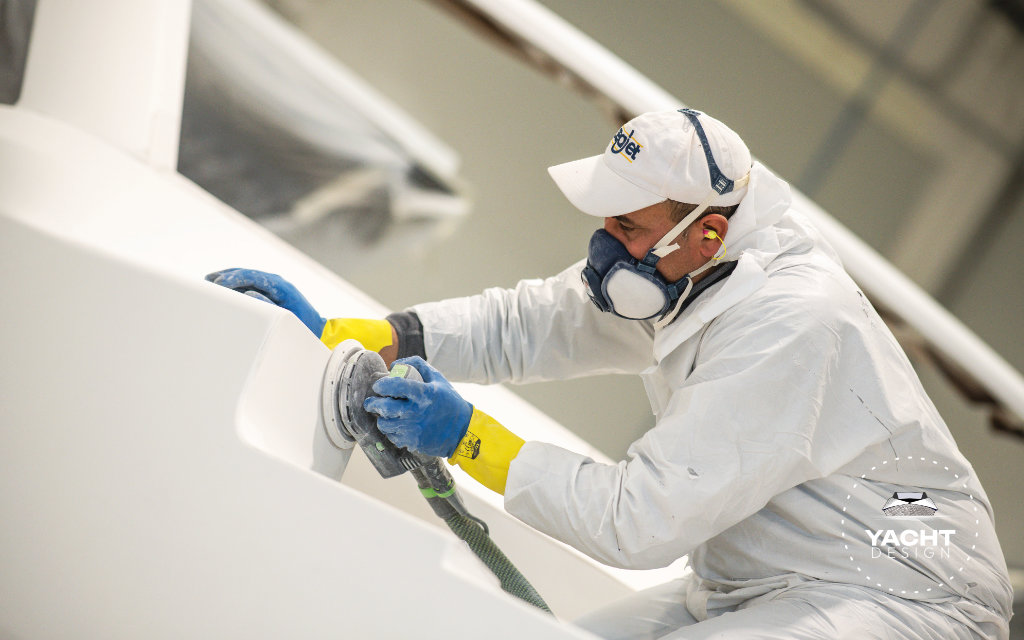
The surface finish of fiberglass products is generally required to be glossy and uniform, without surface irregularities.
To achieve this, a series of sanding steps must be performed to eliminate defects and imperfections from previous processes. The first check is to identify air bubbles that may have formed inside the skin coat or between the skin coat and subsequent material layers.
These defects arise due to insufficient care during the manual lamination of the first mat layers or if structural materials are not pressed enough to adhere properly to the mold. If not removed, air bubbles can cause aesthetic defects or cracks over time, as they tend to expand when exposed to heat, such as sunlight.
The repair involves opening the bubbles and roughening the underlying surface. Small bubbles are filled with fiber-reinforced resin filler, while larger and deeper ones require lamination with fabric layers until the defect is fully repaired.
Next comes the actual bodywork process, sanding the surfaces with increasingly fine-grit sandpaper to remove scratches and marks from the previous sanding. This can be done manually using sanding blocks or with orbital sanders in various forms. The latter method is more commonly used because it is easier and less labor-intensive, but it yields mediocre results compared to manual sanding performed by skilled personnel.
Typically, sanding starts with P40 grit sandpaper on junction areas and repaired spots where excess resin filler may be present. The subsequent grits used are:
- P80
- P120
- P220
- P400
To identify surface defects during sanding, a black powder film or black powder suspended in an alcoholic solution (called “guide coat”) is applied. When sanding, the lower areas or depressions in the gelcoat surface remain visible. Once these are no longer visible, the surface is considered smooth, and the process moves to the next grit.